I am so happy to share a few photos of our recently completed North Vancouver family home renovation project!!
It was a full year in the making, but no detail was overlooked!! See how we transformed this outdated space into a paradise! To follow are a few of the ideas and tricks that we used to give this home the style and elegance it so deserved.
Creating More Space
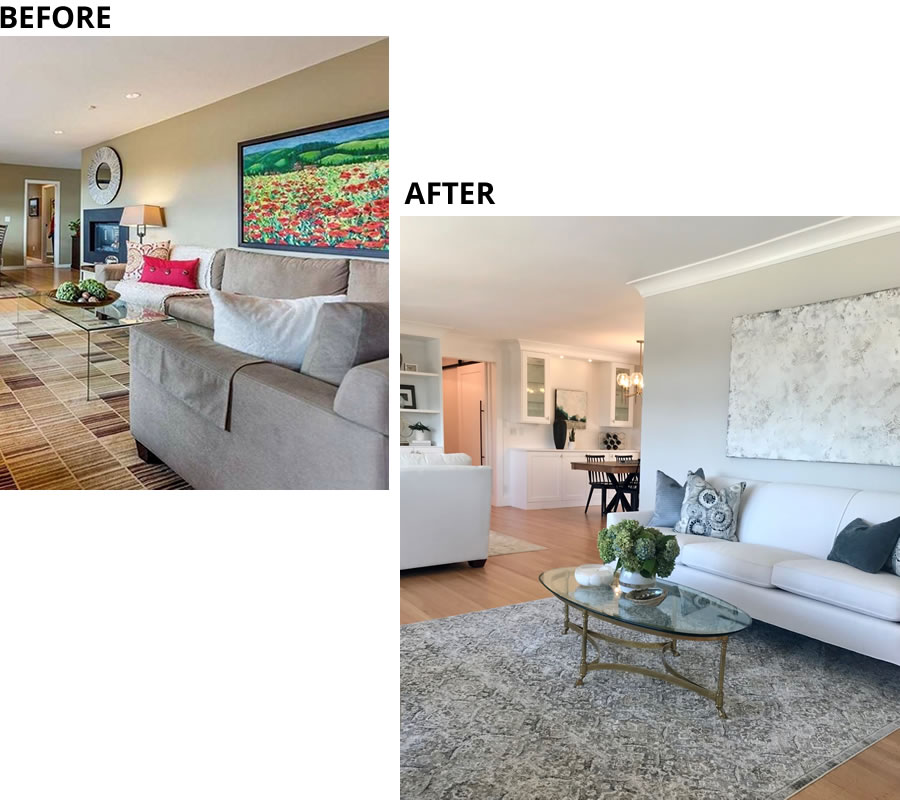
The homes’ original layout had the fireplace positioned at the end of one wall that divided the living room from the kitchen. This created 2 long narrow rooms (living room and kitchen) that were cramped and difficult to furnish.
To solve this problem we removed the section of the wall that housed the fireplace and relocated the fireplace to another wall.
This created a more ‘open concept’ living space, allowing the beautiful light from the massive windows to blanket the entire space. Now, upon entering the home, you can see through the living room to the dining area.
We added an extensive trim package including large crown mouldings to give the home a more traditional look.
Functional Design
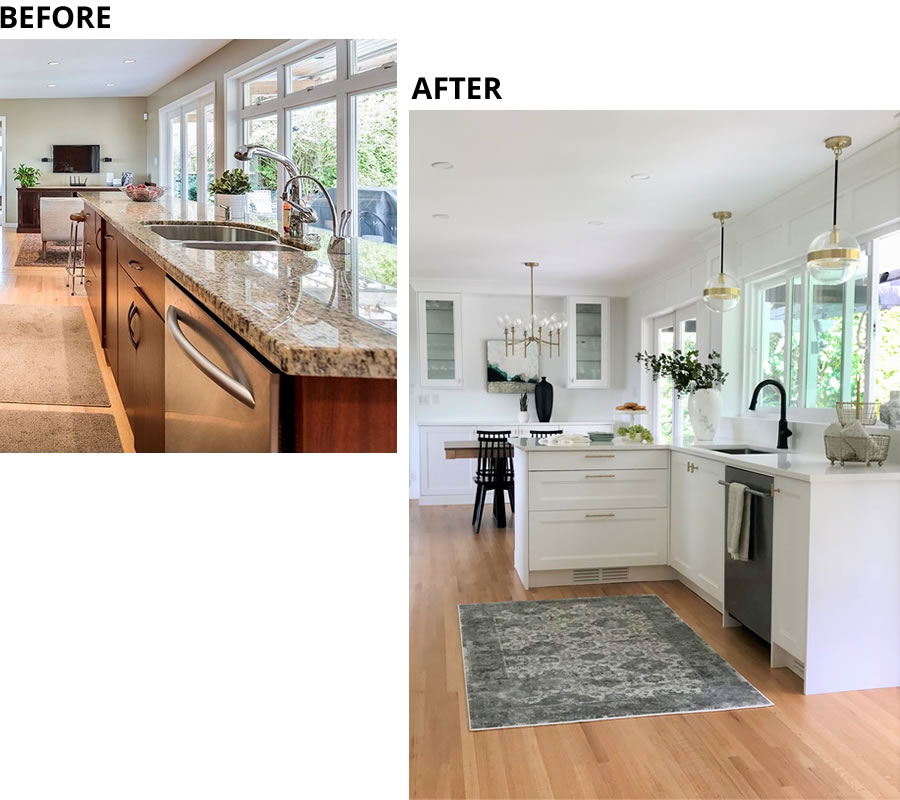
Because the original layout of the main floor had a wall dividing the living room from the kitchen, the kitchen was like a bowling alley. It had a long, narrow island running down the centre.
There was only 24” clearance between the island and the window, hardly room to walk or stand, let alone have any bar stools. This space was virtually unusable.
Once the fireplace was relocated and the wall removed we were able to plan out the new kitchen so it was more functional.
The first thing we did was replace the large window with a smaller one that sits above the countertop. With the additional 24” gained by pushing the sink and counter back to sit on the outside wall, we were then able to add a sit-up breakfast bar at one end of the counter.
As an added bonus, the sliding window above the sink opens up completely as a pass-through to the outdoor entertaining area.
Adding Visual Interest
I love using moulding and trim to create interest and drama to a space. It is economical and the results are transformative. I touch on this subject in my Tips & Tricks ‘A Case in Point’.
In this home, we added an extensive trim package throughout, including crown mouldings, faux transoms above the doors and windows and installed wainscot wherever possible.
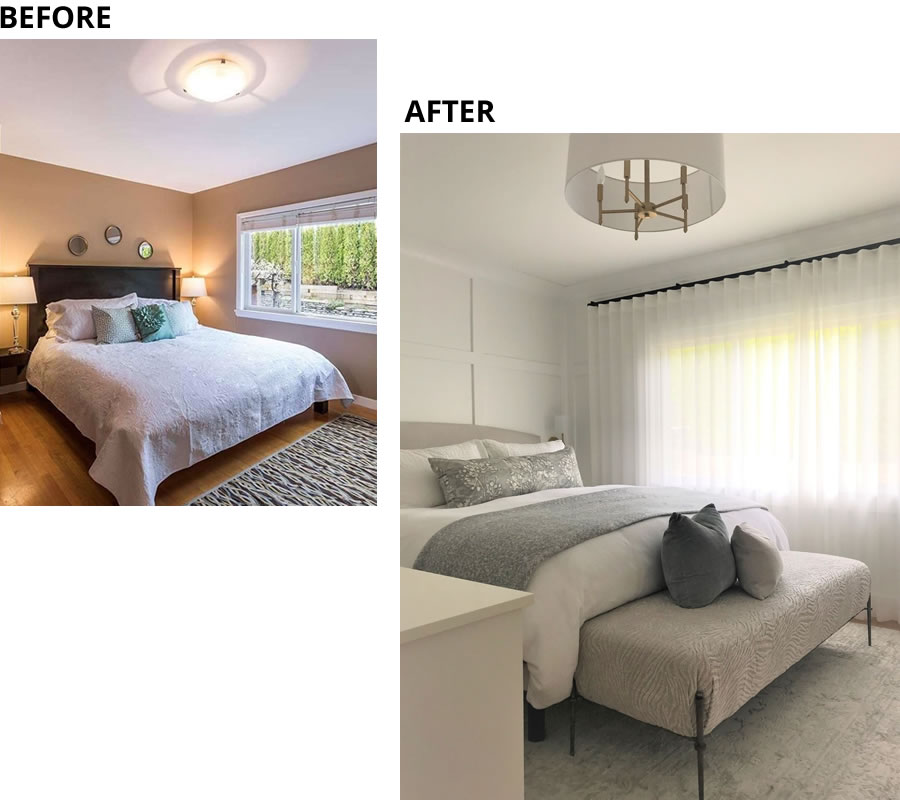
To give the master bedroom a romantic, minimalistic aesthetic, we installed a wainscot to all the walls and then painted everything white. Then we layered in fabrics and finishes in varying shades of white and the client’s favourite shade of blue.
The window coverings are a beautiful linen sheer to allow in the dappled light, but also have the option of blackout roller blinds tucked in behind.
Budget-Friendly Furniture
Although many of the larger furniture pieces were purchased new, I was able to hunt down and source some very beautiful second-hand items that coordinated perfectly with the home’s overall aesthetic.
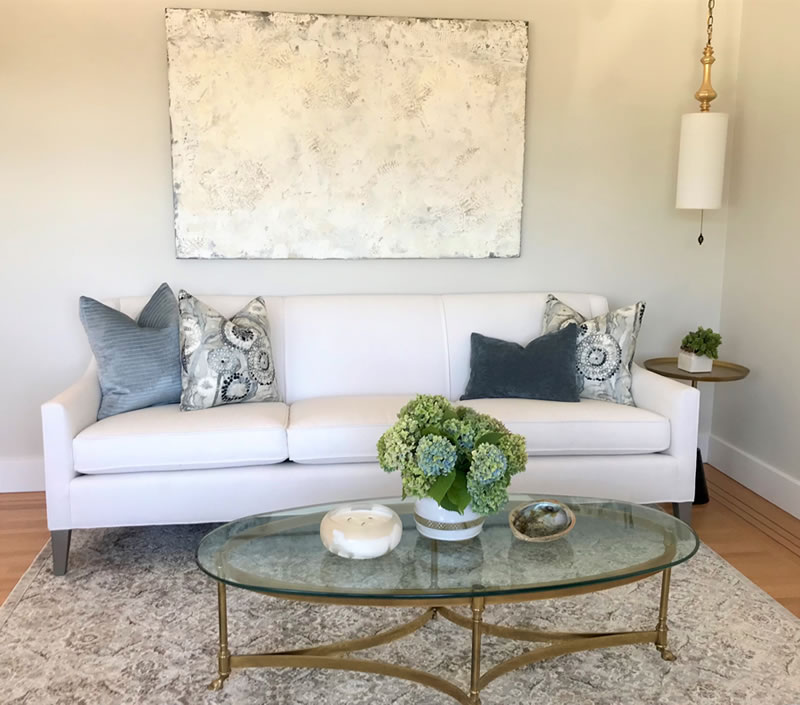
For the living room, I was able to find this amazing solid brass coffee table that was listed on Craigslist. I got it for a steal!! Although I won’t divulge the bargain I got it for, I recently saw this exact one online for $1600 US!!.
If you follow me, you’ve heard me over and over again sing the praises of shopping second-hand and rescuing roadside treasures. I take any opportunity I can to inject these reclaimed objects into my projects. And this project was no exception.
In addition to the coffee table, the little pendant light in the corner is also a piece that was repurposed. In my Tips & Tricks, ‘Turn Me On & Use Me’, I discuss how I transformed this vintage brass light fixture with gold leaf, a new socket and shade into this stunning pendant light.
Styling
The home’s paint colours and furnishings were all in varying shades of white. The walls were painted in Benjamin Moore’s Classic Grey and the doors, trim and cabinetry are Benjamin Moore Chantilly Lace.
The larger furniture pieces are also in soft whites and neutrals. By doing this we created a backdrop to layer in colourful accessories and artwork.
In my Tips & Tricks ‘Prints…the Jumping-Off Point’, I discuss how to use prints as the inspiration for your colour scheme.
In the photograph below, we used this beautiful original painting by Dayna Longquist @daynalongquistart as the jumping-off point for the accessories in the lounging area.
Also, no need to be afraid of using light-coloured upholstery. All the upholstered furniture in this home is covered in Performance Fabric. See Design Tip ‘What a Performance’.

If you live in the North Vancouver area and want to learn ideas for remodelling or redecorating we invite you to contact us for a design consultation.